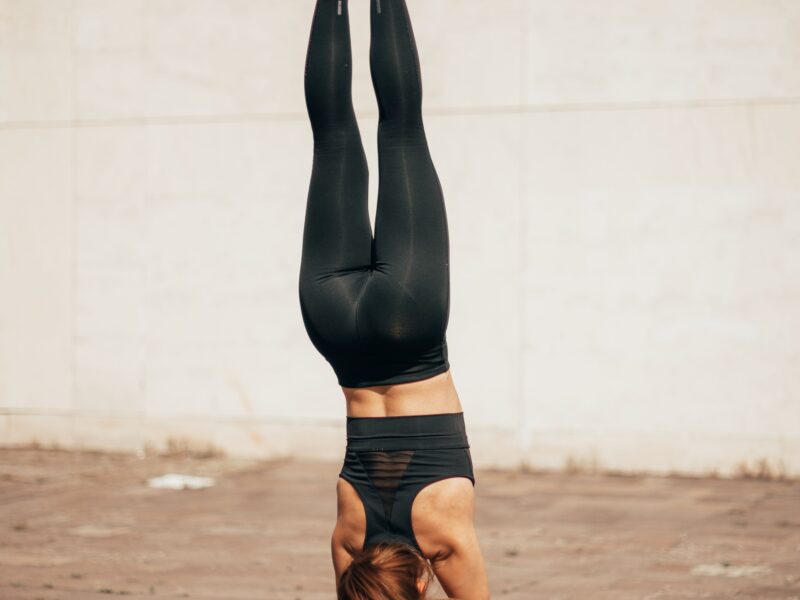
Nine yoga poses to help you heal – or avoid – three of the most common sports injuries.
Whether you are a distant runner who pounds the pavement daily or a weekend warrior who charges hard just two days per week, chances are good you’ve suffered some sort of sports-related injury. The result of repetitive motion and bio-mechanical imbalances, injuries are just about inevitable for anyone who’s active.
By Tiffany Cruikshank
Because yoga encourages you to take inventory of your body as you practice, it is a great tool for preventing injury.The more awareness you have of how your body feels from day to day or from pose to pose, the more likely you are to notice tight or injury-prone areas of the body that need attention before full-blown injuries can occur.
In addition, yoga offers a combination of active and passive stretching that is especially helpful for keeping you injury free.Training to get stronger or faster can lead to tight muscles with a smaller range of motion, limited power, and a tendency to get injured more easily. Active stretching, where the body is moving and stretching dynamically (as in Sun Salutations), creates warmth and suppleness in the tissues. Passive stretching, where you hold a posture for a minute or more in a way that’s relaxed (as in the poses that follow), allows muscles to lengthen even more. The result is more elastic, pliable tissues that help you bounce back more easily from the stressors in your sport.
The following pages describe three of the most common injuries for athletes and some simple ways to address them with yoga. Many sports injuries tend to be chronic, and these poses can be done preventively if you have a history of injury in particular areas. If your injury is acute, you’ll need to rest the area until the inflammation subsides, but if you can do these poses comfortably, they may aid in your recovery (best to check with your health care practitioner first). On days that you train or work out, do these poses after your training session. On your off days, warm up with 5 to 10 minutes of Sun Salutations or a brisk walk before doing these poses.
Reduce tightness in your feet
PROBLEM AREA #1: FEET
Inflammation of the plantar fascia, a band of tissue that connects the heel bone to the toes and runs along the sole of the foot, is one of the most common sports injuries to the foot. Common in runners and those who do sports that involve running or jumping— such as soccer, football, tennis, and volleyball—plantar fasciitis is caused by stress from repetitive foot strikes as well as tightness in the Achilles tendon, ankle, and calf muscles. Such tightness can create too much tension in the plantar fascia, resulting in micro tears and inflammation. Initially, symptoms include pain on the heel or the sole of the foot that is typically worse when you first get out of bed in the morning. Left untreated, plantar fasciitis can cause bone spurs in the heel and contribute to knee, hip, and back pain.
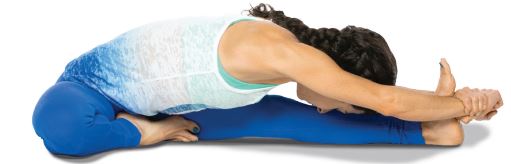
SOLE STRETCH

HOW TO DO IT
Come on to your hands and knees and tuck your toes under. Slowly lean the weight of your hips back and sit on your heels. To start, keep your hands on the floor in front of you and keep some of your weight on your hands as you sit back. As the pose becomes comfortable, you can progress to sitting upright with all of your weight on your heels, palms in your lap. This might be an intense stretch, but you should not feel pain. Hold for 30 to 90 seconds as you breathe easily.
WHY IT WORKS
Targets the muscles and connective tissue on the sole of the foot while stretching the deep layer of calf muscles that moves the toes and supports the arch of the foot.
SUPTA PADANGUSTHASANA (Reclining Hand-to-Big-Toe Pose)
HOW TO DO IT 
Lie on your back, put a strap around the ball of the right foot, and extend your right leg up. Keep your head and shoulders on the floor and grab the strap with both hands. (To make this pose easier, bend your left leg and place the sole of the foot on the ground.) You can bend the right knee if you need to, but keep your thigh close to your belly as you lightly push into the strap with the ball of your right foot. Hold for 1 to 2 minutes, and repeat on the other side.
WHY IT WORKS
Stretches the back of the hip, thigh, and calf, which tugs on the sole of the foot when it gets tight.
SUCIRANDHRASANA (Eye-of-the-Needle Pose)
 HOW TO DO IT
Lie on the floor with both feet on the wall and your knees bent. Place the right ankle on the left knee and flex the right foot. With your right hand, gently push the right thigh, just above the knee, away from your head. Keep your hips, spine, and head on the floor and relax your neck. You can make this harder by moving closer to the wall or easier by moving farther away. To get an even deeper stretch, clasp your hands behind your left hamstring and hug it in toward your torso, with your head still on the ground. Hold for 1 to 2 minutes, and repeat on the other side.
WHY IT WORKS
Relieves the tight hips that are common in athletes who do a lot of running, which limits the movement of the leg muscles, puts more stress on the back of the leg, and increases tension in the plantar fascia.
Release tension in your knees
PROBLEM AREA #2: KNEES
One of the most common causes of knee pain in athletes is the irritation of the iliotibial band (IT band), a thick band of fascia that runs from the top of the outer hip to just below the outer knee. It’s a common misconception that stretching the IT band itself will fix this. The band is simply a fibrous sheet; the surrounding muscles are the cause of the problem. Often, the hip muscles that attach to the IT band become tight, creating tension along the band. The IT band also can lose its ability to glide over the underlying muscles in the thigh, which inhibits knee movement. In this scenario, running or walking can create friction, causing the tissues to thicken and bind, which pulls on the knee and causes the pain associated with Iliotibial Band Syndrome.
 UTTANASANA (Standing Forward Bend, variation)
HOW TO DO IT
Come to standing and cross your right ankle over your left. With your knees slightly bent, fold forward and rest your hands on the floor, a block, or a chair. Reach your sitting bones toward the sky and move your ribs away from your pelvis to prevent your back from rounding. Hold, breathing comfortably, for 1 minute, and then repeat, crossing your left ankle over right.
WHY IT WORKS
Stretches the hamstrings where they meet the IT band.
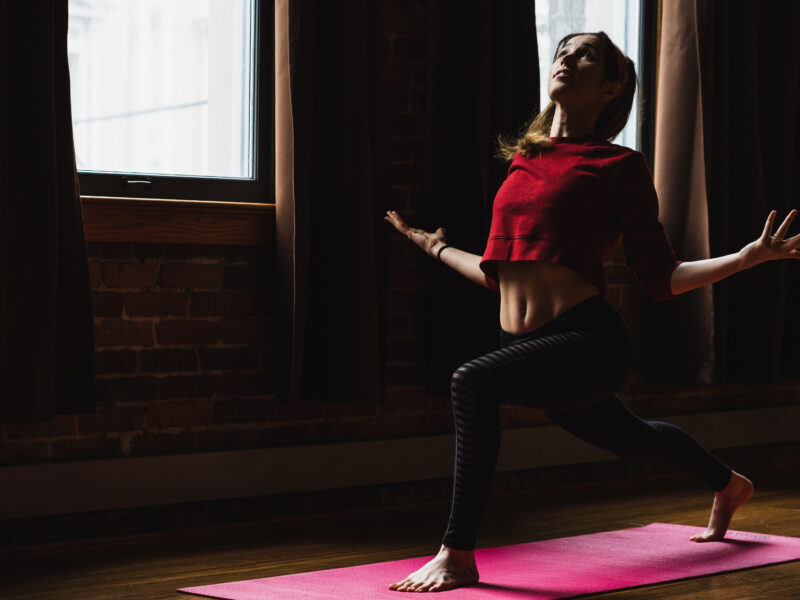
 AJANEYASANA (Low Lunge, variation)
HOW TO DO IT
Come to a low lunge with your right leg forward. Lift the hips up and back until they are directly over the knee on the ground. The tendency in this pose is to lean the pelvis forward and stretch the hip flexors, but in this variation you want to keep your hips over your back knee (move your front foot back if you need to). Without overarching the lower back, place your right hand on your right thigh and extend the left hand overhead and to the right. You should feel this in the outer hip of the left leg. Hold, breathing comfortably, for 30 to 60 seconds, and then repeat on the other side.
WHY IT WORKS
Stretches the difficult-to-reach tensor fasciae latae at the top of the IT band.
 SUPTA GOMUKHASANA (Supine Cow Face Pose)
HOW TO DO IT
Lie on your back and cross one knee over the other. Keeping your head on the floor, hug your knees in toward your chest. If you feel a good stretch, stay here; if you don’t, flex your feet, grab your ankles, and pull them toward your hips. Hold for 1 minute, and then repeat with your legs crossed the other way.
WHY IT WORKS
Stretches the gluteus maximus muscles, which is attached to the IT band.
Stretch out your shoulders
PROBLEM AREA #3: SHOULDERS
The rotator cuff is a group of four muscles that stabilizes the upper arm bone in the shoulder socket and allows the shoulder to rotate. The tendons of these muscles often become irritated, or they can be torn due to a traumatic injury or repetitive motion, especially in combination with weakness in the muscles that stabilize the shoulder blade and anchor the rotator cuff. Because the rotator cuff involves four muscles and their tendons, a wide range of symptoms can be associated with it. Generally, pain is felt over the top of the shoulder, but it can extend to almost anywhere around the shoulder joint itself, including the shoulder blade or the armpit. This is common in swimmers, yoga practitioners, rock climbers, golfers, and tennis players.
GOMUKHASANA(Cow Face Pose, variation)
 HOW TO DO IT
From a seated or standing position, reach your left arm straight out to the left, parallel to the floor. Rotate your arm inward; the thumb will turn first toward the floor, then point toward the wall behind you, with the palm facing the ceiling. This movement will roll your left shoulder slightly up and forward, and will round your upper back. With a full exhalation, sweep the arm behind your torso and tuck the forearm into the hollow of your lower back, parallel to your waist, with the left elbow against the left side of your torso. Roll the shoulder back and down; then work the forearm up your back until it feels parallel to your spine. The back of your hand will be between your shoulder blades. Inhale and stretch your right arm straight forward, parallel to the floor. Exhale and turn the palm up. On the next inhale, stretch your arm straight up toward the ceiling, palm turned back. Bend your elbow and reach down for the left hand. If you can, clasp your hands. If you can’t reach, do this pose with a towel or strap to connect your hands. Hold for 1 minute, and then repeat on the other side.
WHY IT WORKS
Stretches the entire rotator cuff with a combination of internal and external rotation of the arms.
VASISTHASANA( Side plank Pose,Variation )
HOW TO DO IT
Come onto your forearms, with your elbows under your shoulders and your feet together. Roll onto the edge of your right foot and turn your right forearm in 45 degrees. Hug your right arm bone into the socket and press the base of your right index finger into the floor. Lift and lengthen the sides of the rib cage and extend your left arm up. Hold for 30 to 60 seconds; then repeat this variation of Side Plank on the left side.
WHY IT WORKS
Strengthens the muscles of the rotator cuff and teaches them to work as an integrated unit.
PLANK POSE, VARIATION
HOW TO DO IT
Come into table top position. As you exhale, without bending your elbows, lower your rib cage toward the floor and draw your shoulder blades toward each other. As you inhale, push the floor away, pull your rib cage away from the floor, and, without rounding the spine, spread your shoulder blades apart. Once you have the motion, come into Plank Pose and try the same movement there. Visualize your shoulder blades gliding toward and away from each other around your rib cage. Repeat 10 times, rest for a few breaths, and repeat. As your muscles grow stronger, work your way up to 15 or 20 repetitions.
WHY IT WORKS
Strengthens the muscles that stabilize the shoulder blade, which will provide a strong foundation for the rotator cuff
LA-based yoga instructor Tiffany Cruikshank is trained in sports medicine, acupuncture, and holistic health, as well as in Chinese medicine. Find her at yogamedicine.com
Photography Randy Reyes Jr
Model Athlete Shilpi Malik Bhojwani
This article first ran in the print edition of Yoga Journal Singapore, which is now Yogahood Online.