The human body is somewhat of a mad scientist. Case in point: the way our muscles work. Some muscles are easy to consciously access, meaning they take direction from us. For example, you can intentionally spread your toes in Tadasana (Mountain Pose). But other muscles work more autonomously, with no apparent direction from the conscious mind—like the muscles working in the background to maintain your posture. These muscles are more difficult to access intentionally because their function involves tasks we have long since relegated to the unconscious mind.
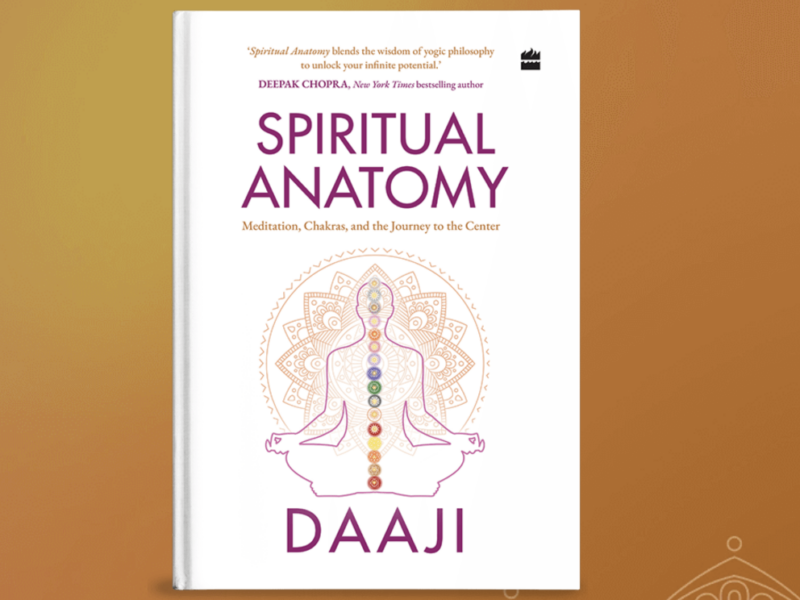
By Ray Long, MD
One such muscle that works mostly in the background (or unconsciously) is the psoas, a core muscle that’s part of the all-important hip flexors and that helps to stabilize the spine. Why does such a big, important muscle have such minor representation in the motor cortex of the brain? It’s all about energy efficiency: We use our psoas to sit down, stand up, and move from lying down to seated; we use it to walk, run, climb, and twist our torso. From a very early age, we use the psoas so much that the brain reassigns it to the level of “background function,” where movement occurs without conscious thought.
From my experience, few people are able to engage their psoas voluntarily (like when you contract your biceps to “make a muscle”). This may be because its actions become habitual during infancy. Yet here’s the good news: You can learn to consciously utilize muscles that tend to do their own thing, and when you do, it can transform your yoga practice. Take Utthita Trikonasana (Extended Triangle Pose) to the right side, for example. When flexing to the right, you could simply use gravity to move your torso over your leg. However, learning to “turn on” your psoas to consciously flex your trunk provides muscular stabilization for your spine, pelvis, and hip that ultimately helps you find the fullest expression of the pose.
To start to awaken your psoas, it helps to know where it is in the body. This muscle originates from the twelfth thoracic vertebra (T12) and the lumbar vertebrae (L1 through L4, with a deep layer originating from L1 through L5), and it runs along either side of the spine, behind the stomach, intestines, and female reproductive organs. From the spine, the psoas continues forward and down, crossing over the front of your sacroiliac joint and joining with the iliacus muscle (which originates on the inside of the pelvis, or the ilium). The psoas and iliacus work together so closely that they’re often referred to as one: the iliopsoas. The iliopsoas then runs over the brim of the pelvis to insert into the lesser trochanter, a knoblike structure on the upper inside of the femur (thighbone).
It’s because the psoas crosses multiple joints that it’s able to move the body in so many ways. For starters, the psoas acts to flex the hip:
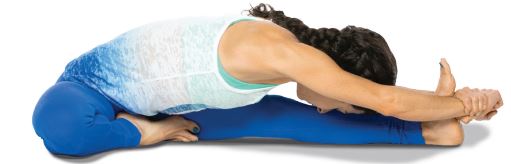
Contracting the psoas either bends the trunk forward or draws the knee up. If you contract your psoas on one side, it laterally flexes the trunk, as in Extended Triangle Pose. Contract the psoas on both sides, and you’ll be able to tilt the pelvis forward, bringing the thigh and the torso toward each other, as in Paschimottanasana (Seated Forward Bend).
The process of awakening your psoas begins with learning how to access it at will. You can use certain cues within your yoga poses to do this, even if you’ve never intentionally activated this muscle. Interestingly, what I’ve found with my students and in my own practice is that shortly after you start to engage the psoas intentionally in certain yoga asanas, you will find that the brain starts to engage it unconsciously, even in other poses. It’s as if the brain is saying, “OK, so now we’re using the psoas in yoga poses,” and starts to anticipate using this muscle. I call this “body clairvoyance,” meaning that the unconscious mind sees clearly what to do and then does it automatically. So essentially, by awakening your psoas, you’re trying to learn how to more readily access the muscle’s unconscious actions, ultimately creating the ability to consciously—voluntarily—engage it
3 poses to awaken your psoas
Virabhadrasana I Warrior Pose I
Warrior I helps to strengthen the psoas of the front leg while stretching the psoas of the back leg. Come into the pose as you typically would: feet 3 to 4 feet apart, back toes turned to a 45-degree angle from the back edge of your mat, with heel-to-heel alignment, front knee tracking over your second toe, arms raised skyward. Then, imagine lifting your front knee straight up toward the sky, as if you were flexing your hip. You won’t actually be able to lift your knee, but this action stimulates the psoas to contract, which should help you feel the pelvis stabilize. Hold this pose for 5 to 10 deep breaths on one side, and then repeat on the other side.
 Utthita Parsvakonasana Extended Side Angle Pose
Similar to Warrior Pose I, this asana helps to strengthen the psoas of the front leg while stretching the psoas of the back leg. To move into the pose from Warrior I, turn your back foot so it’s parallel to the back edge of your mat—aiming for heel-to-arch alignment—bring your front elbow to your front thigh, and extend your top arm over your head, toward the front of your mat. Now attempt to press the front elbow down against your thigh by flexing your trunk to the side. Relax for a moment, then attempt to lift your quad straight up against your elbow. Finally, combine the two actions simultaneously. Neither your trunk nor your thigh will move in either of these actions, but you will feel your psoas muscle isometrically engage in your pelvis.
 Paripurna Navasana Full Boat Pose
While most of us think this pose is all about the abs, quite a bit of the work also happens in the legs and the psoas. In fact, Navasana is a great way to strengthen the psoas isometrically. Sit tall on your yoga mat with your knees bent and feet flat on the mat. Place your fingers on the floor to either side of your hips and use that light traction to lift your chest. Exhale and lift your feet off the floor so that your thighs are angled about 45 to 50 degrees relative to the floor. Stretch your arms alongside your legs, parallel to each other. Press the heads of your thighbones toward the floor to help anchor the pose and lift your sternum. Stay here for 5–10 full, easy breaths.